Your cart is currently empty!
Introduction to Print on Demand

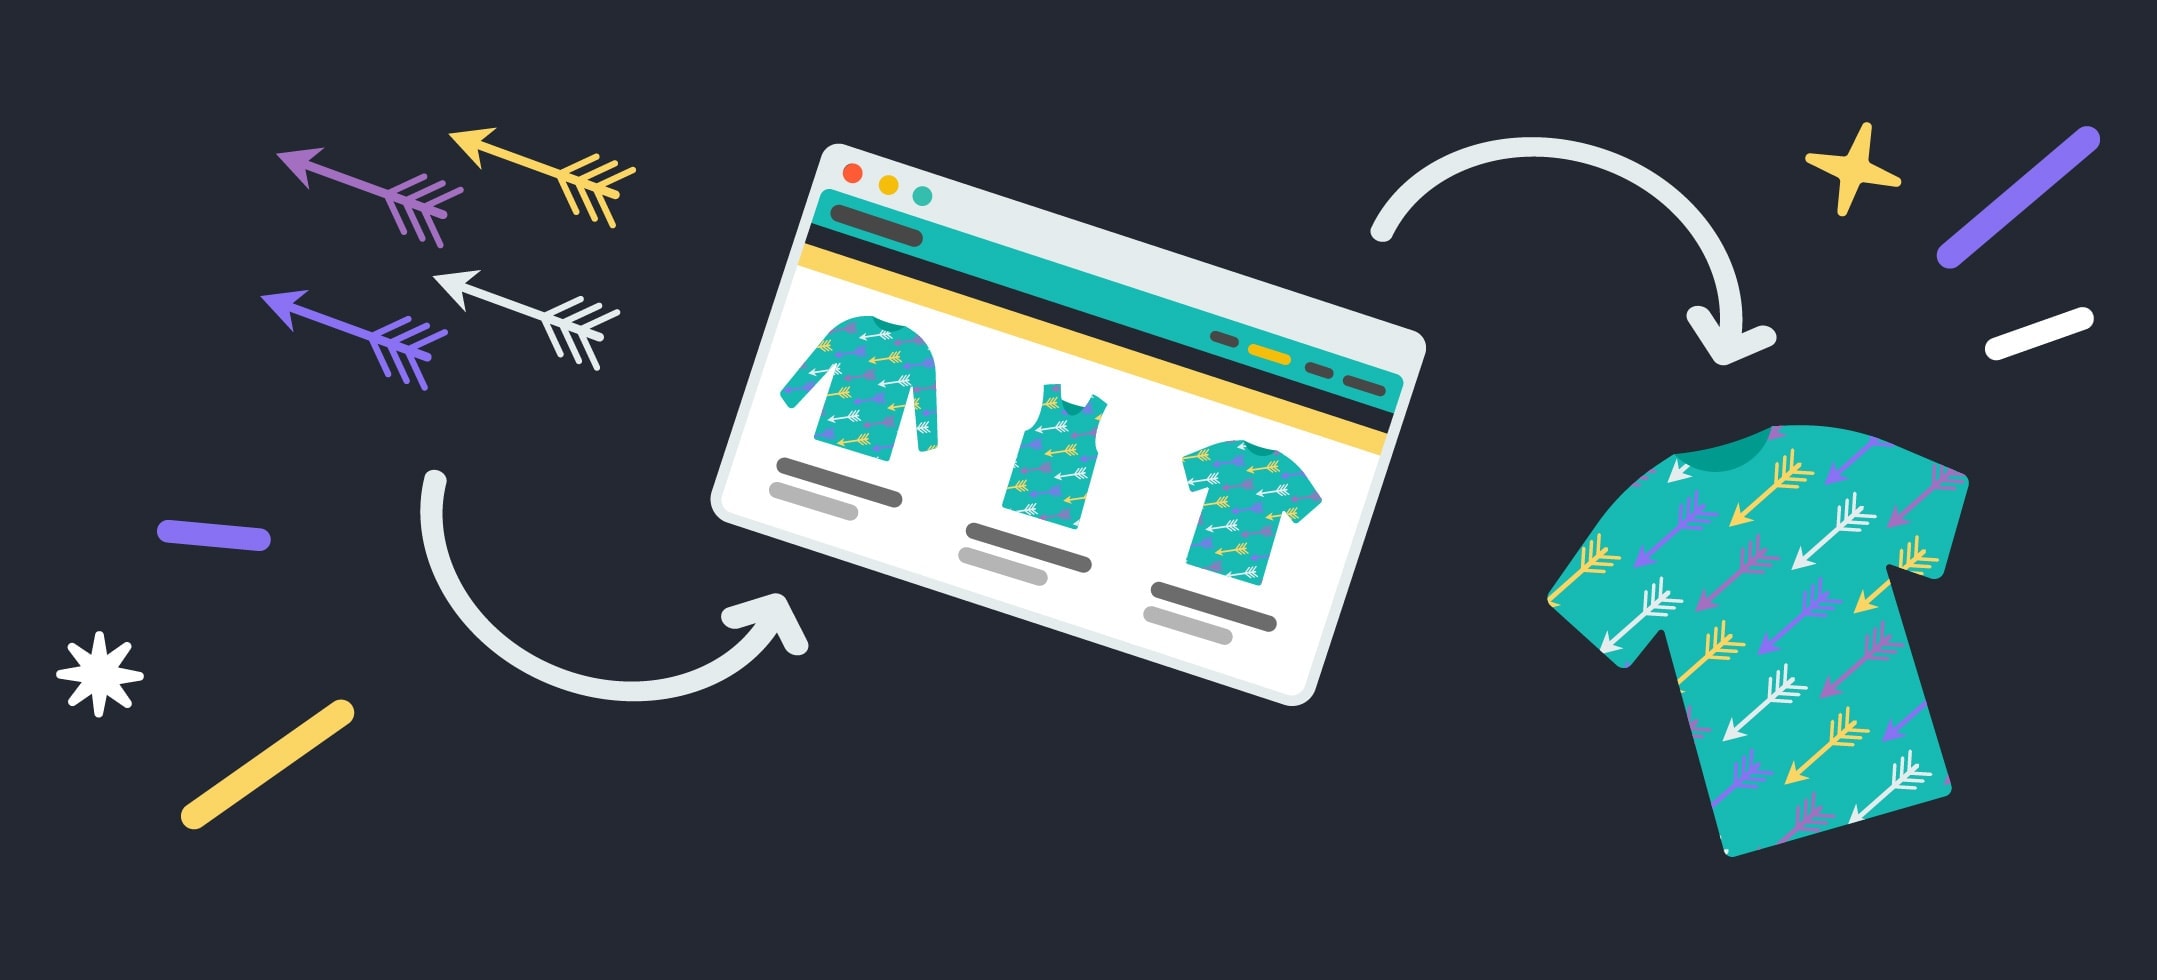
Before diving into the integration process, it’s crucial to grasp the fundamentals of print-on-demand (POD). In this model, you generate designs and upload them to POD platforms, displaying them as virtual listings at no cost. The platform takes over when customers discover and purchase your design on an item. They print your design on the purchased product, handle shipping, and manage customer service without your intervention. This aspect of POD makes it an appealing, low-maintenance business model for sellers, as it doesn’t require additional staffing. Your role primarily involves designing and uploading new creations. Once a design is uploaded, it typically remains available indefinitely, alleviating the need for frequent updates to your product line or store.
Which Print-on-Demand Sites Are Best?
Once your design is uploaded, it remains available indefinitely, allowing for ongoing purchases over the years. Before delving into the tutorial, it’s important to note two key points. Firstly, I recommend three print-on-demand (POD) platforms based on my extensive experience: Teespring, Redbubble, and Merch by Amazon. These platforms stand out because they are free to use, have no listing fees, and actively market your products. Unlike other POD sites that require you to attract your traffic, these three not only host your designs at no cost but also promote them, drawing in traffic to their marketplaces. This results in sustained organic sales without any marketing expense on your part. To give an idea of their reach, Teespring and Redbubble each attract millions of visits monthly.
Teespring vs. Redbubble, Merch by Amazon
Merch by Amazon, also known as Amazon, attracts roughly two billion monthly visits to its website. These visitors browse through the marketplace where your products could be featured. An important aspect is that Amazon’s platforms, Teespring, Redbubble, and Merch, operate on a non-exclusive basis. This allows you to upload a single design to each site, creating three distinct listings and increasing your product’s visibility. A customer may find your design on Teespring without being aware of Redbubble, amplifying the exposure of your work. This strategy significantly boosts the potential for more views and increases sales over time. Before we proceed with the tutorial, it’s essential to understand the operational differences between these platforms. Redbubble and Merch by Amazon offer immediate marketing support for your designs. Once uploaded, your listings are integrated into their marketplaces, typically within a few hours to a maximum of 24 hours, ensuring your products gain prompt exposure.
The marketing provided by these platforms begins immediately upon listing. However, Teespring operates differently, employing a “trust score” system for new sellers. As a newcomer to print on demand, you’ll need to set up accounts on each platform, but Teespring requires you to meet specific criteria before featuring your designs in their marketplace. To build your trust score, you must avoid copyright infringement in your designs and achieve two to three personal sales. Once these conditions are met, Teespring will recognize you as a trusted seller, actively market your products, and incorporate your listings into their marketplace, reaching their audience of 30 million monthly visitors. In this tutorial, we will revisit how to secure these initial sales without Teespring’s marketing assistance, using methods that don’t involve paid advertising. This approach aligns with the channel’s ethos of avoiding paid ads in print on demand. Now, we should clearly understand how to proceed with the tutorial.
Why Niches Are Important for Print on Demand?
Let’s begin the tutorial, which includes a selection of paid tools I’ve found valuable for niche research, among other purposes. Although using these tools is not mandatory, I strongly endorse them for their effectiveness, which you’ll soon understand. Our initial step, particularly for those new to print on demand, is identifying a profitable niche. A niche is a specific topic or theme around which you’ll design your products. Conducting thorough niche research at the outset is crucial to discovering areas within print-on-demand that are balanced with competitors. Venturing into highly competitive niches as a newcomer can result in your listings being overshadowed by numerous others. Therefore, I suggest focusing on less competitive niches to accelerate your initial sales and meet Teespring’s trust score requirements. The aim is to pinpoint a niche that has limited competition but also enjoys substantial search interest.
People are searching for this particular niche, yet only some products are available, offering limited choices for consumers. This scenario benefits new sellers, allowing them to fill the gap with their designs. As buyers regularly search for these niche items, they will encounter a broader selection, predominantly composed of your creations, enhancing the likelihood of making sales from your listings as they browse the available options. Now, let’s proceed to the computer and introduce the first niche research tool, Merch Informer. You’ll need to either sign up for free or log in if you already have an account. Let’s quickly look at the pricing: it costs around $ per month, but I have a discount code that reduces the price to approximately $ per month, and they offer a free trial. For those just starting, a three-day free trial is available to test the service.
Merch Informer offers comprehensive functionality, making it a valuable asset for long-term use, especially when considering new design ventures to ensure they are worth the effort. The discounted subscription, around $ per month, is accessible via the link in the description, where you can also initiate a free trial. Once logged in to Merch Informer, you’ll find various tools, including a competition checker on the left panel. This feature allows you to assess the potential of the niches you’re interested in by indicating whether they represent a good or bad investment of your time. Before this video, I researched to save time and identified promising and less promising niches as examples, along with helpful tips. For instance, the “high school graduate” search term received an ‘A’ grade, indicating it’s a strong niche choice. This grading system, ranging from A to F, helps evaluate niche viability. It’s crucial to note that the information and ratings provided by Merch Informer are derived from Merch by Amazon’s data, which aids in understanding market dynamics.
We’re focusing on three platforms: Teespring, Redbubble, and Merch by Amazon, with the latter being the largest, garnering about two billion views per month. The data from Merch Informer is primarily sourced from Merch by Amazon, but I generally consider it applicable to both Teespring and Redbubble. Merch Informer is particularly useful because it quickly indicates the viability of a niche through a simple letter grade, contrasting with other research tools that aggregate data from across the internet, encompassing all types of search data rather than being specific to print-on-demand. In contrast, Merch Informer’s insights are tailored to the print-on-demand context and are sourced directly from Merch by Amazon. In our example, “high school graduate” is the niche in question, receiving a favorable grade. This tool shows the level of competition and the number of listings with bestseller status, indicating successful sales, and allows you to view the top-selling designs in this niche on Merch by Amazon, offering valuable insights into what’s currently popular.
This insight can spark your creativity and assist in generating design ideas by examining successful examples. When utilizing Merch Informer, remember to enclose multi-word phrases, like “high school graduate,” in quotation marks to ensure accurate search results; without them, the tool might misinterpret the query by evaluating each word independently, leading to incorrect ratings. It’s crucial to search for sufficiently narrow niches: “high school graduate” is more precise and thus preferable to broader terms like “graduate” or “dogs.” For single-word searches, quotation marks aren’t necessary, but specificity is critical to avoid drowning in a sea of competing products. With these strategies in place, we’ve effectively harnessed Merch Informer to identify a viable niche. This preparation enhances the prospects of our initial designs being in demand, thanks to limited existing choices in the market.
Having identified our niche, the next step is designing within it. We’ll start with one design to demonstrate the process, and once you grasp it, you can produce multiple high-quality designs. Our design tool simplifies this task significantly, even for those without graphic design experience, like myself. Now, let’s move on to this recommended design tool, which you can find through a link in the description. The tool in question is placeit.net, typically priced at around $ per month. However, I have a discount code that reduces the cost to approximately $ per month, detailed in the description. Unfortunately, there isn’t a free trial available through placeit.net, but the discount helps. Placeit.net, alongside Merch Informer, comprises the essential toolkit for discovering niches and crafting appealing designs. With these tools, the process becomes a matter of repeating these steps to continue producing and selling designs.
Finding Good T-Shirt Niches for Print on Demand
In this tutorial, we will continue repeating my elaborate process. By typing our target keyword, like “high school graduate,” into the search bar, the results will be narrowly tailored to that niche. Yet, using broader terms like “graduate” or “education” will yield a more comprehensive array of t-shirt design templates that could be applicable. Often, designs under the broader education category on placeit.net can suit the high school graduate niche perfectly. I’ll start by searching for “graduation” to see what we find. This search will pull up t-shirt designs, social media post templates, and mockups. We’ll delve into these additional resources later in the tutorial. For now, we’ll focus on the t-shirt design section to explore what “graduation” brings up, acknowledging its specific relevance to our niche.
Placeit offers a limited number of templates specific to particular niches, sometimes just a handful, while boasting over a thousand templates overall. The availability narrows as the search becomes more niche-specific. To expand the options, I’ll change the search term to “education” and ensure the ‘search within results’ feature is turned off to access a broader selection. After updating the search, we shift back to t-shirt designs and find ourselves with more choices. This illustrates the benefit of creative searching: a larger pool of designs to work with. Now, we need to select a design to modify for our t-shirt. I’ll opt for a “Happy Graduation Day” template, which seems ideal for a high school graduate. Remember, the target audience for these designs often includes parents, grandparents, or friends looking for a gift for the graduate rather than the graduates purchasing for themselves.
So, with that said, here’s a template we can start customizing. We can move things around. If we want to go back, we just hit reset layout. We can change all of this text to say anything you want. You can put an extra text if you like, and then you can even change the font of it. So, if we click the down arrow, we can switch it to anything we want. So, I like that new font that we just switched it to. So I’m going to switch to the other one as well. Should we change the color of the text, we can change that with this dropdown over here. And then, if we want to add more texts, we just hit add another text right over here. Then, this one is added with a background, so we know we come over here, switch to text background, and turn that off.

Turn it to the checkerboard, and it’ll make it transparent. Return to text color; you can switch it to anything you want. Again, we can switch the type of font if we need to. So I can use this one. So, I’m just going to uncheck it. If you need to upload a logo or image, you can do that right here by clicking upload. It’ll go to your computer documents, and you can select what you want to add. You have a lot of creativity that you can do here. Since we just moved this to the side, it’s offering us the chance to reset the layout again to put it right back in the middle, and that’s perfect. The feature that allows for easy integration of elements is beneficial when adjusting various design aspects. Placeit stands out because it offers a wide array of graphics with full commercial rights, eliminating the need to source and verify the rights for illustrations separately.
You can seamlessly incorporate these graphics into your design with a simple click, streamlining the design process significantly. Unlike other design tools where adding an illustration might place it awkwardly on the design, requiring further adjustments, Placeit integrates these elements directly into the template, enhancing efficiency. In print-on-demand, where creating designs quickly is critical, such features are invaluable. They allow for the rapid production of numerous designs, leveraging the organic traffic flowing through these marketplaces to maximize earnings. Continuing the design process, I found an initial design I particularly liked. To explore more options, like those related to college graduation, switching the search to ‘graduation’ might yield a variety of applicable icons and templates to utilize.
You can peruse and alter various commercially viable graphics within the tool. Once the design is complete, the next step is to modify the background color to be transparent. This adjustment highlights the text’s color, such as dark blue on white. If you prefer the graphic in white or another color, select it and choose the desired hue. For demonstration, if saved now, this design would feature white text on a transparent background, which is ideal for placing on darker garments to ensure visibility. To clarify the example, I’ll change all the text to black, making it easier to discern the design we’re finalizing. This change helps illustrate the transparent background effect. After finalizing the design, downloading is straightforward, with the platform confirming the graphic’s commercial viability and displaying its size, ready for use on print-on-demand platforms.
Size Your Design Files for Print on Demand
The file dimensions are set by pixels, sufficient for platforms like Teespring or Redbubble. To download, hit the ‘download now’ button, saving the file on your computer for subsequent uploads to these sites. However, a crucial tip for time-saving involves Merch by Amazon’s specific size requirements. Merch by Amazon, a significant entity in the print-on-demand industry, necessitates design files to be, by, pixels, differing from the current size of, by, pixels. To accommodate this, Placeit facilitates easy resizing. After downloading the design, select ‘view all’ to access your recent creations. From there, use the crop/resize function under the dropdown menu to adjust the dimensions to meet Merch by Amazon’s standards of pixels.
Click ‘download’ to initiate the image processing. After a brief wait, the file will be ready for download and can be saved directly to your computer. Once downloaded, the file opens to reveal a design tailored for Merch by Amazon, complete with a transparent background ensuring clarity and quality, ideal for t-shirt printing. While Merch by Amazon requires specific dimensions, Teespring and Redbubble do not impose such restrictions. Therefore, Amazon’s design for Merch can also be used for these platforms, streamlining the process and saving time. We now have a finalized design, appropriately sized for Merch by Amazon and suitable for Teespring and Redbubble, specifically crafted for the high school graduate niche.
Before we exit Placeit, I’d like to introduce another design method that’s underutilized yet highly effective, which I strongly suggest exploring. With your Placeit subscription, access extends beyond t-shirt templates to include logo designs. These logos are intended for branding purposes but are equally valuable for creating print-on-demand apparel. Select ‘see all of our templates’ within the logo section to view and customize any template, adapting it to your chosen niche or creating more intricate designs. This process mirrors the t-shirt designs, allowing for text, fonts, and color customization but with broader design possibilities. Like with the t-shirt templates, the next step is to set the background to transparent, maintaining consistency in preparing designs for print-on-demand products.
Proceed by clicking the download button, and then resize the image to meet Merch by Amazon’s specifications, similar to the previous process. It’s essential to realize the versatility of Placeit, as it allows the use of logo and t-shirt design templates for creating your apparel graphics. Now, transitioning to the next phase of uploading your designs to print-on-demand (POD) platforms, we’ve successfully determined our niche and crafted our initial design. The next step involves uploading this design to Teespring, Redbubble, and Merch by Amazon. Let’s start with Teespring. If you’re new to Teespring, you must create a free account that is accessible globally. Once your account is set up, navigate to the overview section. Here, I’ll share an anecdote from a tutorial account I’ve used, which amusingly sold an item, earning a profit, despite being intended solely for demonstrative purposes.
After setting up your account, head to the ‘Start designing’ section. Please scroll down to find various products, but initially focus on the standard t-shirt, as it’s the top-selling item in the print-on-demand sphere. While you can later add multiple products to a single listing, start with something universal like the unisex t-shirt, suitable for both men and women. Typically, options like the classic or comfort tee are good choices. These selections will display the production cost, which is manageable for you as the seller. For example, if the production cost is around $, and you set the selling price at $, the customer pays the $ total. Teespring covers the production costs, with the remaining $ as your profit. Hence, as a seller, you’re not incurring the printing costs; the customer’s payment covers these.
Let’s select the classic tee, where you’re presented with two options that might seem confusing: ‘buy’ or ‘sell.’ The ‘buy’ option is for those who wish to create and purchase their designs at cost, not for marketplace listing. Conversely, as we aim to sell our designs, we’ll choose the ‘sell’ option. This directs us to the design interface on Teespring. While Teespring allows you to create designs with text and images directly on the platform, I advise against this since it doesn’t permit the external saving of the design file. This limitation underscores the advantage of using Placeit, where you can design, save, and then upload the same file across different print-on-demand platforms for broader distribution. Therefore, we’ll select ‘add image,’ navigate through our computer files, and upload the design we prepared in Placeit.
By selecting the file from our computer, it’s seamlessly uploaded onto the t-shirt template in Teespring. If necessary, you can adjust the placement, though the default center position is typically ideal. Once the design is set, you mainly deal with the front side of the shirt, as this is the standard and most popular print area. While dual-sided printing is an option, I suggest sticking to the front side for your designs.
Next, you’ll encounter the product color options. Drawing from my experience, it’s wise to limit the selection to no more than five colors. Offering too many choices can overwhelm buyers, leading to ‘paralysis by analysis,’ where the abundance of options prevents decision-making. To avoid this, curate a concise palette that complements the design and ensures it stands out clearly on each chosen color. Placing the design on a navy shirt makes the dark text challenging to read, so I’ll opt for lighter colors like red, green, and orange. Given this shirt features a male model, I’m selecting colors typically associated with men. However, if your design targets men and women, include a balanced color range, keeping the total under five. For instance, replace orange with pink if catering to women as well.
Teespring will suggest a retail price, but these recommendations are slightly higher. Based on my experience, setting the price a few dollars below the recommended amount attracts more buyers. For example, if producing the shirt costs $, and you aim for a sale price of $, your profit margin would be calculated accordingly, covering both Teespring’s share and the manufacturing costs. While Teespring might suggest a price of $, I advise setting it at $ to enhance sales potential. Setting the price at $ will still yield a profit of $ per shirt, positioning it competitively below the standard price point of $. However, pricing the shirt too low, such as at $ or $, is not advisable. While it might seem like a strategic move to undercut competitors and boost sales, this approach could be more successful in the print-on-demand sector.
When setting prices in different currencies, aim for consistency, recognizing there will be minor profit variations due to exchange rates. This approach simplifies pricing and maintains stability despite currency fluctuations. The necessity for pricing in multiple currencies arises from the global nature of print-on-demand; sellers can upload designs from anywhere, and buyers can purchase from different parts of the world, necessitating adjustments based on the currency used at the fulfillment center’s location.
How To Upload Designs To Print on Demand Sites
As a seller, you will receive payments in your currency, while buyers can purchase in theirs, necessitating the setting of prices in different currencies. Now that we have addressed pricing, we can move on. I’ll revert the display color to white for uniformity before continuing to the next step, where we select the styles available in this listing. I advise limiting the options to up to five colors and five styles to avoid overwhelming potential buyers. You’ll see added styles on the selection panel, such as the unisex classic tee already chosen. Rather than including multiple variations of t-shirts, diversify the product types like long-sleeved shirts, hoodies, tank tops, and mugs to cater to varied preferences. Let’s focus on hoodies and sweatshirts, known for their substantial profit margins. Here, you can choose from various styles; I’ll opt for the classic pullover hoodie, activating and editing it in the listing.
Next, we’ll select colors for the hoodie, sticking to the principle of offering at most five to avoid customer decision fatigue. I’ll opt for white as the primary color, ensuring it appears first in the listing. To adjust which color appears initially, use the edit function and set it to white. Regarding pricing, the recommended price for the hoodie, which is a bit high, includes a substantial profit margin. Instead, I’ll set the selling price at $, aiming for a profit of $ per sale, which seems reasonable. After saving these settings, the classic tee and hoodie, prominently displayed in white, are ready in our listing. The process involves repeating these steps for each style, aiming to include a varied yet focused selection: a t-shirt, hoodie, tank top, long-sleeve shirt, and mug, totaling five distinct items.
Depending on the design’s theme, I might replace the mug or other items with alternatives better suited to the specific motif. Next, I’ll quickly add the remaining products, ensuring I meticulously select and edit the preferred colors, prominently featuring white as the initial color choice, and adjust pricing. Defaulting to the suggested pricing can result in prices that are too steep, so I’ll lower the cost to $, slightly below the recommendation, to ensure competitiveness. This approach applies to the long sleeve and other items, aiming for a profit margin of seven to $ per sale. After adding four items, the next step involves incorporating accessories like mugs into the listing. Including primary colors for each item is crucial, as choosing the correct color to feature first and adjusting pricing to be just under the suggested amount ensures each change is saved. Consequently, we achieve a diversified listing of five products, typically encompassing a t-shirt, hoodie, tank top, long-sleeve shirt, and mug, tailored to the design and strategically priced.
The listing is now complete, and by selecting ‘continue,’ we move to the final stage, where we input the title and description. Based on my experience, including the central theme or element of the shirt in both the title and description are crucial for optimizing keyword relevance and aiding in the platform’s ranking process. In crafting the description, simplicity, and clarity are key; avoid overcomplication or keyword stuffing. I use a straightforward template that you can adopt or modify: “Add some fun to your wardrobe with this [item], or give it as the perfect gift.” Personalization is necessary—insert specific keywords that reflect your design’s theme. For instance, in our context, “Add some fun to your graduation wardrobe with this [description of the design],” where the design is humorously related to graduation, effectively tailors the message to the intended product and audience.
Incorporate humor into the description by mentioning it directly, for example, “funny graduation design,” to enhance the item’s appeal and relevance. Utilizing a template for the description allows for easy customization based on the niche, ensuring it’s concise yet compelling. Including pertinent keywords ensures the product is correctly categorized and displayed in searches.
When finalizing the listing, you’ll set a unique URL, often incorporating keywords to align with search queries like “graduation day” or “happy graduation day.” If the ideal URL name is already taken, adapt it slightly, such as appending a number or word—this URL enrichment with keywords aids in improving search visibility.
Set the listing’s visibility to the public to ensure it’s accessible in the marketplace. If you have a storefront, you can add the listing there, which I’ll discuss shortly. After reviewing the details, proceed to publish the listing. If there are any issues, such as the page not loading correctly, attempting the process in a different web browser might resolve them, and it could be more compatible for future listings. With your first Teespring listing completed, you’re now an active participant in the print-on-demand marketplace. This means your designs, available on various items like t-shirts, hoodies, and mugs, are ready for purchase. Customers have the flexibility to choose their preferred color and size. Upon making a sale, the set profit margin is credited to your account and is available for withdrawal at any time.
Configuring your payout method is crucial to facilitating payment from Teespring. Access the settings from the dropdown menu in your account and link your payment details. You can enter your PayPal or Payoneer account email, depending on your preference. PayPal is commonly used in the U.S., while Payoneer offers a more global reach, making either option viable for receiving payments from your sales. If PayPal isn’t available in your area, setting up a Payoneer account is a viable alternative for handling payments on Teespring. You don’t need a business account for either PayPal or Payoneer; a free personal account suffices for these transactions, with no requirement to establish a formal business. After linking your email to the payment service, a verification link will be sent to you, so ensure you confirm this to activate your account.

Having reached this point, you’re well on your way to success. With the Teespring listing live, the following steps involve Redbubble and Merch by Amazon, following a similar listing procedure. The same title, description, and design file used for Teespring can be applied to these platforms. Unlike Teespring, Redbubble and Merch by Amazon don’t necessitate managing a storefront or building a trust score, simplifying the process. Your primary focus here is to identify viable niches and utilize your designs effectively across these platforms. In your selected niches, aim to craft and upload as many high-quality designs as possible to the platform. The process is straightforward without establishing storefronts or engaging in individual marketing efforts. For Merch by Amazon, however, account creation involves an application process due to high demand and limited capacity.
You must request an invitation, which entails a brief application form. To aid in this process, I will provide a link to a video with advice on crafting a successful application, which you can view after completing this one. Upon acceptance into Merch by Amazon, you initially have slots for your designs. Select and upload only your best work within the most promising niches to these limited slots. Direct marketing efforts are optional as these products will garner organic sales. Achieving sales will elevate you to the next tier, expanding your capacity to design slots, with subsequent sales further increasing your allowed submissions and enhancing your growth potential within the platform.
Merch by Amazon aims to continuously ascend the ranks, populating your account with as many designs as possible. This principle is equally applicable to Redbubble and Teespring, where the aim is to populate the platforms with many quality designs in profitable niches. Having covered the approach for Redbubble and Merch by Amazon, we now turn our attention back to Teespring, mainly focusing on building a niche storefront, a step influenced by the platform’s trust score mechanism. In essence, Teespring could be handled similarly to Redbubble and Merch by Amazon, where the strategy revolves around identifying lucrative niches and filling them with a vast array of designs. However, the unique aspect of Teespring is the necessity of establishing a trust score, which necessitates achieving two to three initial sales through your efforts. Securing these sales is crucial as it integrates your products into Teespring’s marketplace, unlocking the platform’s marketing resources. This is a strategic move to leverage Teespring’s extensive monthly visitor count, which nears million, to enhance visibility and sales opportunities in their marketplace.
Transitioning back to Teespring, we’ll navigate to the storefronts section. Here, you’ll initiate a new storefront tailored to the niche identified via Merch Informer, such as high school graduates. The storefront name should be niche-specific and precise, avoiding vagueness. In this case, I’d suggest “High School Graduation Tees.” Despite planning to offer a variety of apparel like sweatshirts and tank tops, incorporating “tees” in the name helps convey the idea of graphic shirts, which can be beneficial for branding. Ensure the name chosen is unique and available on Teespring. Following the naming, the next step involves storefront customization, focusing on aspects like the header. While you can alter the header color and other elements, I recommend keeping some settings default to streamline the setup process.
After making any changes, click ‘save’ and proceed to the banner section to upload a banner image. The optimal size for this banner is pixels. I’ll guide you on creating this banner shortly. Next, focus on the crucial step of adding products to your storefront. Although each product variant appears as a separate listing, I advise including just one to avoid redundancy. For instance, if you applied the design to five different apparel types, choose only the classic tee to feature in your storefront. Select it by ticking the checkbox beside its name, then confirm by clicking ‘done.’ This method integrates the chosen item succinctly into your storefront. Significantly, selecting the t-shirt doesn’t limit customer options; clicking on it in the storefront directs to the complete listing, displaying all available styles and colors and facilitating a comprehensive view for potential buyers.
We’ve now set up a basic storefront, which is fully operational despite lacking advanced customization or a polished banner photo. By selecting ‘go to store,’ we can view the actual storefront, which I’ll keep open for subsequent reference. This storefront will be our initial platform for generating traffic and securing the trust score necessary for success on Teespring.
The next step involves attracting initial traffic to this Teespring storefront to facilitate those crucial first sales for establishing our trust score. Once the trust score is achieved, the focus shifts to identifying lucrative niches and populating them with compelling designs. Our immediate objective is to draw potential customers to our storefront, showcase our products in the selected niche, and kickstart sales activity.
How To Get Free Traffic From Instagram for Print on Demand
I’ve discovered that leveraging Instagram is an excellent strategy for driving traffic to your storefront. You can attract a focused audience by setting up a dedicated, cost-free Instagram page and utilizing targeted niche hashtags. Incorporate a link to your Teespring storefront in your Instagram profile, and as you post content relevant to your niche, users will encounter your posts, visit your profile, and subsequently navigate to your storefront, thus exposing them to your products. Let’s move on to setting this up on Instagram. We’ll switch to my phone to access Instagram and initiate the setup process. The aim is to create a new Instagram account distinct from yours dedicated solely to promoting your Teespring products. Upon starting a new account, align the username with your storefront name to maintain brand consistency. Use underscores or periods to modify the username if the exact name is already taken, ensuring it remains recognizable and relevant to your Teespring niche.
Since ‘high school’ is already in use, I’ll opt for a variation, incorporating underscores as separators: highschool_graduation_tees. Once this username is accepted, as indicated by a check mark, select ‘next.’ Instead of using existing login credentials, set a new password for this account. You’ll also need to input a birthdate; for this example, select an age that makes sense. Next, input a contact method, but remember, if your email is already tied to another Instagram account, you’ll need a new one. Creating a new email for this purpose is straightforward with providers like Gmail. After setting up these basics, you’ll be guided through the account’s initial setup, including adding a profile photo, which we’ll cover shortly, but let’s skip this step for now. You now have a new Instagram account dedicated to your Teespring storefront, focusing on high school graduation tees. Begin by editing your profile, where for the name field, reiterate your storefront name, “Highschool Graduation Tees,” to establish and reinforce your brand identity.
How To Make Instagram Content To Post for Print on Demand
On Instagram, your account name is displayed beneath your username, clearly indicating what your page represents, like “Highschool Graduation Tees.” One of the crucial elements on Instagram is the website link section, where you should insert the link to your Teespring storefront. I’ll pull this link from my computer and input it here. With the website link in place, the profile starts taking shape. Although the bio section offers an opportunity to customize further and enhance the profile’s appeal, explaining briefly what your page offers, like “The best high school graduation tees in town,” subtly hints at local pride and competition, adding a personal touch. You can explore various bio styles and formats through other tutorials, but the key is communicating what visitors will find on your page.
After completing these details and hitting ‘done,’ your Instagram profile is set to guide visitors directly to your Teespring storefront via the provided link, showcasing the array of products you offer in this niche. After clicking on the Instagram profile link, visitors can view the complete listing of each product, including images of the front and back and the variety of items available, reflecting our online setup. Now, shifting focus from the phone, we delve into finalizing the Instagram profile essentials: crafting a profile picture, generating engaging content, and identifying effective niche hashtags to drive traffic to the Teespring storefront and encourage purchases. Next, we’ll create a visually appealing profile photo, a banner for the storefront, and the content to be shared on the Instagram page. The aim is to display the merchandise, in this case, t-shirts, while ensuring the posts engage and resonate with the audience. Merely posting screenshots from the product listings might become monotonous and less appealing. For engaging content, consider using a platform like Placeit to generate captivating visuals and posts, thereby maintaining audience interest and interaction on Instagram.
How To Create T-Shirt Designs
Returning to Placeit, which we previously discussed with its monthly subscription cost, we can create t-shirt designs and access a vast array of mockup photos. Placeit offers nearly all templates, with new additions daily, including recently updated ones. This wealth of resources means we can continuously generate fresh content for our Instagram page. To create engaging content, navigate to the mockups section on Placeit, select t-shirts, and explore many mockup options available. The process is straightforward: choose a suitable mockup that aligns with your niche—high school graduation, in our case—and integrate the designs we’ve crafted on Placeit. This method seamlessly superimposes our designs onto the chosen mockups, offering professional-looking content for our Instagram feed.
Targeting the right audience is critical, so aim for mockups featuring individuals who embody the high school graduate demographic. Utilize Placeit’s search function to refine your selection, ensuring the content is visually appealing, relevant, and tailored to the audience you aim to attract and engage with on Instagram. To refine our search on Placeit, we’ll focus specifically on mockups, excluding t-shirt design templates, to find imagery related to graduation, like graduates in caps and gowns. This targeted approach ensures the mockups are aligned with our marketing needs. Once we select an appropriate mockup, we upload the design from our storefront collection.
During the upload, Placeit offers an option to crop the image. Initially, we’ll use the recommended settings, but adjustments are possible to get the perfect fit on the apparel. For example, if the design sits too low, resembling more the stomach than the chest, we can reposition it higher for a more natural appearance. After fine-tuning the placement to our satisfaction, we downloaded the mockup. Placeit confirms that commercial use is permitted, underlining its value for marketing purposes. Once the processing is complete, we download the image, producing a professional-looking photo ideal for our Instagram content. The photo showcases a graduation-themed design worn by a model fitting our target demographic.
Placeit’s mockups are exceptional, ensuring our design looks professionally integrated into the apparel. To leverage this image on Instagram, we must transfer it from the computer to a phone. Airdropping is a convenient option for Apple users, while others might prefer emailing the image to themselves for download on their mobile devices. The goal is to get the image onto the phone to facilitate posting on Instagram. Once the image is transferred to my phone, we proceed to Instagram to share our first post. Tap the add button, select the transferred mockup, and adjust to fill the screen. There’s no need for color or style edits, as Placeit’s professional-quality images are ready for use. After making any desired adjustments, we proceed to the next step, preparing to add captions and hashtags to enhance the post’s reach and relevance.
How To Post To Instagram With Niche Hashtags
The next step involves crafting the caption for our Instagram post. It’s essential to avoid overtly sales-oriented language. Many Instagram users make impulse buys, so we aim to position our product as an ideal, timely find rather than pushing for a hard sell. They often purchase spontaneously, especially if they see something that would suit someone they know. In crafting the caption, the aim is to subtly inform potential customers about what’s available. A suggested approach could be: “Do you know a soon-to-be graduate? Looking for the perfect gift? Check out our collection for some amazing graduation tees!” This language invites interest without aggressive selling. After finalizing the caption, we’ll share the post, marking the first step in actively engaging with our Instagram audience. The next critical phase is harnessing the power of hashtags to maximize the post’s visibility and attract potential buyers to our page.
Due to the lack of followers on a new page, our Instagram post may only reach a few people initially. To counter this, we utilize Instagram’s search function, explicitly focusing on tags related to our niche, like high school graduation. This search will reveal numerous relevant hashtags to include in our posts. We aim to select hashtags that accurately reflect our niche and appeal to our target audience. Avoid outdated or irrelevant tags and focus on those that resonate with high school graduation themes. Compile a list of suitable hashtags in the phone’s notes app, picking those that best align with our content and audience. You can incorporate up to 30 hashtags per post, providing ample opportunity to cover various aspects of our niche. Start with a focused list of hashtags directly related to high school graduation, and then broaden your search to include general graduation tags, enhancing the potential reach of each post.
In a focused niche like high school graduation, staying precise with your hashtag strategy is crucial to avoid veering into loosely related areas, such as college graduation. The goal is to target the specific audience relevant to your niche precisely. I selected three hashtags, but you can identify and utilize up to 30 to optimize your post’s visibility. After compiling your hashtag list, copy it from your notes. Then, navigate to your shared Instagram post and paste these hashtags as a comment. This method keeps the post clean and visually appealing, as the hashtags won’t clutter the main post text; instead, they’re accessible under the ‘view comments’ section, maintaining their functionality for search and discovery without overwhelming the post’s aesthetics.
Placing hashtags in a comment rather than the main caption keeps the post uncluttered. After sharing your content, promptly add a comment with the hashtags, leveraging a prepared list of up to 30 relevant tags stored in your notes. This list can be consistently used across your Instagram posts, streamlining the tagging process and increasing visibility. Next, focus on updating your profile photo to reflect your brand. While you can use the same image from your initial post, another option is to create a diverse mockup using Placeit featuring a different model or t-shirt design, which can then be set as the profile image. With the profile photo updated and hashtags strategically placed in comments, your Instagram page gains character and purpose. These hashtags play a vital role in connecting with the audience interested in your niche, as Instagram will more likely display your posts to users searching for these specific topics.
Imagine this: Someone scrolls through Instagram and sees your post with a cool graduation shirt and a clever caption. They think it would be a perfect gift for a graduating friend, so they tap your profile and click the store link in your bio. That’s the power of targeted hashtags, and it’s a free way to drive traffic to your store. Here’s how it works: You create eye-catching graduation shirt designs using Placeit, then upload them to printing platforms like Teespring, Redbubble, and Merch by Amazon. For Teespring designs, you’ll want to create mockups with Placeit and post them on Instagram using relevant niche hashtags in the comments. People interested in graduation gifts stumble across your posts thanks to those hashtags, and because your targeting is spot-on, they’re more likely to want to buy a shirt. The key is consistency – keep creating content with relevant hashtags to attract a steady stream of potential customers to your storefront. Remember, with this method, you’re reaching people looking for exactly what you offer!
Don’t worry. Once you get those first few sales on Teespring, they will build up your ‘trust score’ and take care of the promotion for you! They’ll start showcasing your designs in their marketplace, reaching billions of people every month. Platforms like Redbubble and Merch by Amazon do that right from the beginning, so you don’t even need to fuss with storefronts or Instagram marketing for those. Speaking of storefronts, remember that banner on Teespring? I remembered! Placeit helps with that, too. They have mockups specifically designed to fit that narrow banner shape perfectly. If you want to create an eye-catching banner image, Placeit’s your tool.
Conclusion
So, there you have it—the whole print-on-demand process. I know this was a long article packed with info, and if you stuck with me this far, you’re a champ! The description will include links and a table of contents to help you quickly find the necessary sections. The key is finding even more awesome niches and creating as many fantastic designs as possible. With your Teespring trust score building, you won’t need to worry about storefronts or Instagram soon. I hope this has been helpful! If you have any questions, drop them in the comments.
- Printful’s Ultimate Guide to Starting a Print-on-Demand Business: https://www.printful.com/blog/how-to-start-a-print-on-demand-business/
- Shopify’s Print on Demand: A Low-Risk Way to Sell Custom T-Shirts, Books, and More: https://www.shopify.com/blog/what-is-print-on-demand
- Creative Market’s Tips for Success with Print on Demand: https://creativemarket.com/blog/print-on-demand-guide
- Oberlo’s How to Make Money with Print on Demand: https://www.oberlo.com/blog/make-money-print-on-demand
- BigCommerce’s Guide to Print on Demand Versus Dropshipping: https://www.bigcommerce.com/blog/print-on-demand-vs-dropshipping/
- Redbubble’s Guide to Selling: https://www.redbubble.com/about/selling
- Teespring’s Ultimate Guide to Print on Demand: https://community.teespring.com/training-center/the-ultimate-guide-to-print-on-demand-pod/
- Merch by Amazon’s Official Page: https://merch.amazon.com/landing
- Printify’s Print on Demand Manual: https://printify.com/print-on-demand/
- T-Shirt Magazine’s Guide to Print on Demand Platforms: https://www.t-shirtmagazineonline.com/print-on-demand-platforms/
Discover more from Shadab Chow
Subscribe to get the latest posts to your email.